Friday, 2 November 2012

how to backup your computer

how to backup your computer

Having your computer backup at all times is golden.
Think about it, it’s not your hard disk price that should worry you, it’s all the data you have stored that can be lost. Documents, photos, mp3′s, software, bookmarks, stored logins, chat history etc… The list is endless.
I had my hard disk burned down, twice!, and it’s not pleasant feeling, not at all.
Too bad I had to burn my data twice, before I decide to have computer data backed up at all times.
Get that data on a safe place, please!
best of luck :)
Update: Dropbox now offers 2GB of free storage and also has great desktop app that does the backup in the background. You can also use it to share files between PC’s – currently has 50 millions users. Sign up for free

Format Windows XP

Format Windows XP

how to format and install windows xpThis explains step-by-step how to format hard drive partition using the Windows XP installation CD.
Before you continue, make sure you have backup of all documents you may need that are saved in C:, My Documents folder or your desktop.
Tip: Click the images to enlarge.
  • Step 1- Installation CD Insert your Windows XP installation disc into your CD or DVD drive.

  • Step 2 – Restart your computer and start Windows setup using Microsoft Windows bootable XP disk
  • Restart your computer. As you computer boots, a screen with message “Press any key to boot from CD..” will show up counting from 9 to 0, here you need to press any key to start the setup. Note: If your computer doesn’t display the “Press any key to boot from CD..” message (by default it should), check your motherboard manual for info where to enable the “Boot from CD” setting, after you enable “Boot from CD” option from your BIOS, the message will show.
  • Step 3 – System Loading After you enter the setup, the CD will load up a blue screen and will start loading operating system files (this make take few minutes). When it finishes, it will list a few options, “Press ENTER to set up Windows XP now” is the one we need. Click it.
  • Step 4 – Accept Windows usage agreement Second screen is “The windows usage agreement”. It should be displayed now, showing that you need to press F8 to accept the agreement. Press F8 to accept. How to format a computer
  • Step 5 – Setup start If an existing Windows XP installation is detected by the system, you are prompted to repair it. We will bypass this step
  • Step 6 – Delete old partition and format At this point you need to select the partition where you prefer to install Windows Xp. This is where you will delete your partition and format drive C. The box in the lower half of the screen shows all your drives and the partitions that currently exist on your hard disk. Use the Up and Down Arrow keys to highlight/select your “C:” partition and press the “D” key (pic 6.1). On the next screen press the ‘L’ key (pic 6.2) to confirm that you want to delete partition “C:”, and finalize the deleting of the partition. (if you have only “Unpartitioned space” and you have no C: or D: partitions, skip this step) How to format a computer
  • Step 7 – Create installation partition Now you should be back on the screen prompted to choose where to install Windows. The box on the lower half of the screen should no longer show a partition, instead of “C:” you should see “Unpartitioned space xxxxxMB”. Select/highlight this with the arrow keys and press the “C” key to create a partition on the drive (this is where you will install windows). Now setup tells you the minimum and maximum sizes the partition can use and lets you pick the size. The default size is the maximum available, leave the default value and press Enter.
  • Step 8 – Format the computer (the hard disk) This screen lets you choose the file system you prefer the drive to be formatted with. Choose NTFS “Quick” (recommended because NTFS is faster and more secure). Use the arrow keys to select and hit Enter. How to format a computer
  • Step 9 – Start Windows XP Setup Setup will start to and will auto-format the “C:” partition, and start with Windows XP installation. From here you are all set and the installation of Windows will proceed. This will take a while. The computer will reboot several times, and will continue with installation. Don’t remove the Windows XP setup CD, and don’t press a key when prompted (we already did that).

  • Get the complete version of this tutorial with screenshots and detailed instructions here (link

Format Windows Vista

Format Windows Vista

how to format and install Windows VistaIn this tutorial we will be installing clean version of Windows Vista.
Usually people format windows vista in try to fix their system, repair some functionality or upgrade from windows XP.
Recommended: If you are not sure about your computer hardware compatibility with Windows Vista, get this Upgrade Advisor and check your system compatibility. Next make sure that you have the Drivers CD (that came when you’ve purchased your PC), or if you don’t have them, download the latest Vista drivers for your hardware (you can find them at the support section of your hardware manufacturer, remember to save them to different partition than “C:” (don’t save them in MyDocuments folder, it will get deleted with the formatting), safest way is to store them in other partition than C: (ex. D: , E: , removable drive like USB or burn them on a CD/DVD)
Now after you are sure that your PC is compatible with Vista, and you have all the drivers saved, you can proceed with Formatting Windows Vista.
  • Step 1. Insert your Windows Vista DVD. The DVD is bootable so after you restart your PC (with the DVD inside) the Windows Vista Setup will begin loading ( if the setup doesn’t start automatically, make another restart and press F2, or F8 after the boot screen and select boot from DVD ).
  • Step 2. The first screen of the Format Windows Vista sequence will show up. At this point you need to select your Language and Time and currency format (click the image to enlarge). Press Next.
  • Step 3. Press Install Now
  • Step 4. After a min you will be asked for your Product Key. Scenario 1: If you don’t have your product key, you can skip this step and at the next step you will be asked to pick Vista Package that you want to install : Vista Home Basic, Home Premium, Business, Ultimate. If you install windows vista without providing product key, after 14 days you will have to enter a valid product key, or if you don’t, you’ll be forced to format windows vista again. This is good if you want to test which windows vista version is best for you, before your purchase.
    Scenario 2: You enter your product key (keep it handy!), and at the next screen your purchased version will be auto-recognized.
  • Step 5. Accept the Microsoft Windows User License Terms and press Next
  • Step 6. Dialog – “Which type of installation do you want ?” Scenario 1: If you already have another operating system installed (ex. Windows XP) you will have the Upgrade option enabled. It’s up to you to decide if you prefer “clean” install or upgrading from previous Windows Installation. Clean install is recommended for improving system performance, and Upgrade Setup is recommended if you have some files in your C: , My Documents, or Desktop folders that you don’t want deleted.
    Scenario 2: You already have operating system installed but you want to format your drive, deleting the old system and installing fresh Windows Vista copy. In that case select the C: drive and press Format ( don’t format all drives! only the primary where we are installing Windows Vista – ” C: “. The setup will do the rest.
  • Step 7. Select Disk 0 and click Next
  • Step 8. The copy process will begin. This process can take some time, so relax a bit, make a coffee or something :D . Your input won’t be required here for some time.
  • Step 9. After Windows Vista Setup finishes, the computer will reboot.
  • Step 10. Windows Vista files are copied , and now setup will configure Windows Vista for your PC. This step will take some really good time.
  • Step 11. Installing Windows Vista finishes, insert your User Name and Password here.
  • Step 12. Give your PC a name! and select one of the colorful backgrounds
  • Step 13. Select your preferred security settings. If this computer is not behind a firewall, the best option is the ” Use Recommended settings”. If you are using firewall then you can select “Install important updates only” (Windows Update). If you want to be protected and your Windows Vista to have the latest updates from Microsoft , select the first option.
  • Step 14. Select your time zone and location.
  • Step 15. Network Configuration – Select your computer location. This settings sets your network permissions.
  • Step 15. This is self explanatory :) Welcome to your new Windows Vista Operating System
  • Step 16. After you press Start, some Windows Vista settings will be upgraded automatically.
  • Step 17. You now need to install some drivers that the system will not install automatically.
  • Thats it! You’ve finished installing Windows Vista.

Format Windows 7

Format Windows 7

how to format and install Windows 7Windows 7 is far better than previous windows versions (XP and Vista). The install process is plain simple and easy to follow. Big Bravo! for Microsoft for this. Now, just follow these steps and you will install windows 7 in no time
You can Install Windows 7 via DVD Disk you’ve purchased or with bootable USB.
This post explains installing windows 7 with dvd disk.
- 31 steps total, every step is screen-captured

First, insert your Windows 7 Boot Disk into your dvd drive and reboot your PC
  • While the PC is rebooting, you will be prompted ” Press any key to boot from CD…” Just press any key here

  • After you press a key, windows will load installation files.
  • Windows 7 setup will start
  • Select your language, time and currency format and keyboard input (US)
  • Click Install Now to proceed
  • Setup will load for a min or two
  • If you do, select I accept the license terms and click Next
  • If you are upgrading from Windows Vista select Upgrade, if you had Windows XP you have to select Custom (Advanced). Upgrade from Windows XP to Windows 7 is not available. Click Custom (Advanced)
  • Select the Partition where you want to install Windows 7 and click Next. You will need at least 5716mb free space.
  • If you don’t have enough free space to Install Windows 7, you will receive the following warning
  • If that’s the case, you will need to format the partition where you previously had Operating System installed. WARNING: Formatting a partition will erase all existing data on the partition, proceed only if you have backed up all your files!
  • If you want to format the partition, go to Drive options and format the partition where you want to install windows 7. Again, do this only if you have backed up your documents/files!
    click format and then yes
  • After you press Next, Windows 7 Installation will begin. Approximately takes about 30 min to 1 hour to finish, depending on your computer speed.
  • After half an hour, setup is complete and windows 7 installation is almost finished. Few more minutes
  • Now your computer will reboot, since the Windows 7 DVD boot disk is still in the drive, the message press any key to boot from DVD will appear. We already did that, so this time DO NOT press anything. Just wait 5 sec and your PC will continue booting and finish installing your operating system.
  • Windows will continue booting and installing, almost there!

  • Finally! Insert your name (this will be your windows username)
  • If you want to, insert password for your computer. ( Hey….you won’t forget it, right? :) )
  • Insert your Windows 7 product key and press Next
  • Do you want Microsoft Updates for your new operating system? It is highly recommend you know…! Select use recommended settings
  • It’s time for Time zone, select yours from the drop down menu
  • Depending on your location, select the appropriate network location.
  • If you have more than 1 computer, type homegroup password for sharing files. Make sure to remember it
  • Windows is finalizing your settings
  • Can you see the finish line ? Yup, we’re there
  • That’s it. Now insert your computer manufacturer drivers CD and install drivers. Also FYI, Windows 7 has great driver support, go to Start –> Control Panel –> Select View By = Small Icons –> Click Windows Update
  • Check for updates and click on optional updates, to see which drivers windows 7 found for your computer automatically.
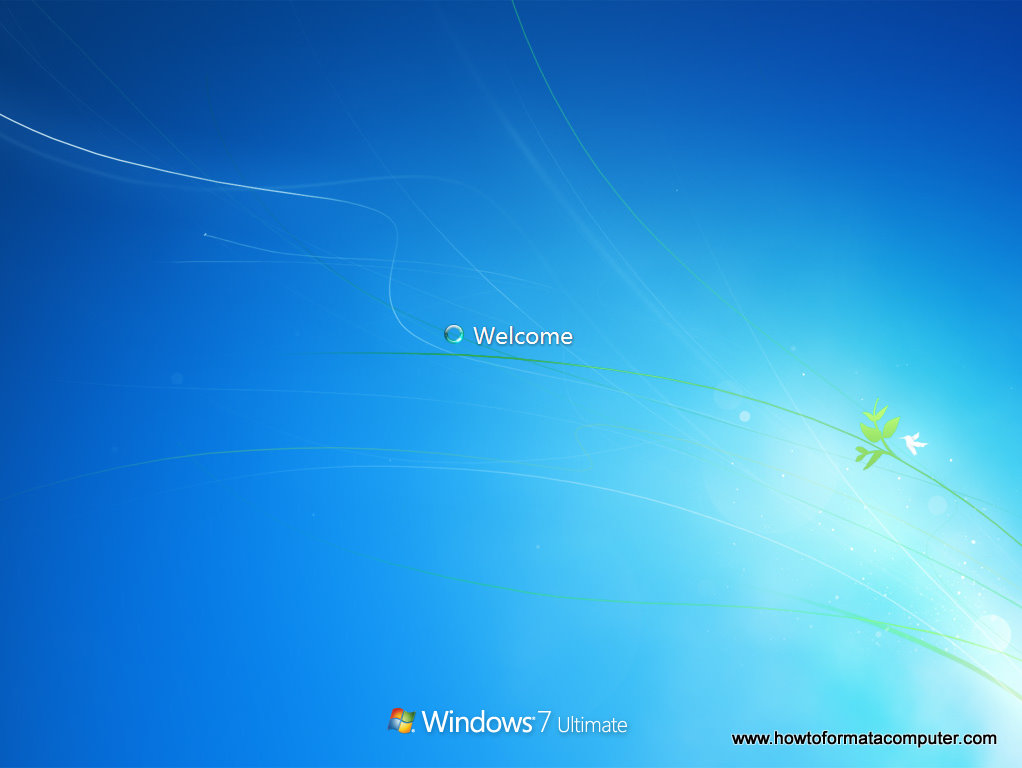
  • Install Windows 7 - Welcome screen
    Install Windows 7 - Welcome screen
    Tutorial: How to Install Windows 7
    Done!
    Get the complete version of this tutorial with screenshots and detailed instructions here (link)

The Home Computer Security CentreThe Home Computer Security Centre

The Home Computer Security Centre

BY mayur khokhar

LockDown is the source for security information and resources for the home computer user.

Setting a BIOS Password

Make your computer ask for a password without installing anything.
Your computers BIOS is the first program that is run when your computer starts. You can tell the BIOS to ask for a password when it starts, thus restricting access to your computer.

To enter the BIOS setup program, sometimes called CMOS setup:

Turn on or reboot your computer. The screen will display a series of diagnostics and a memory check.
A message like "Hit the <DEL> key to enter the BIOS setup program" will appear.
When you do hit DEL at the right time[1] you'll see a menu screen something like this:
Note: Some BIOS versions use a graphical type menu with icons (a GUI) or have a text interface that appears differt to the one shown, the principle however is exactly the same.
As you can see there are two options that relate to passwords, Supervisor Password and User Password, these relate to controlling access to the BIOS Setup Program and the Machine Boot respectively.
Note that not all BIOS's have this password feature, your bios may not have it in which case you won't be able to restrict access to your computer in this way.
Select USER PASSWORD and you'll be prompted to enter a password:
You should now enter a password of up to eight characters (most BIOS's are limited to eight characters unfortunately).  I recommend you use the full eight but take care that you choose something you'll not forget, for help choosing passwords see here.
The BIOS will then prompt you to confirm the password, just type the same thing again.
Now you'll want to set your system to ask for that password every time it boots, so select the BIOS FEATURES SETUP option, to see a menu something like this:
Fairly obviously, it's the Password Check option we're interested in, so select it and change the setting to ALWAYS.
Now navigate back to the main menu and select SAVE & EXIT SETUP.  Your machine will then reboot and you'll be prompted for the password.
Each and every time you boot you'll be asked for password you chose.
Please note that this method of restricting access to your computer is not completely foolproof, there are ways around it. But it will stop or at least delay the majority of casual attempts to get access.

If you forget your BIOS password, consult your motherboard manual or if you don't have one, consult the website of the BIOS manufacturer.
[1] It's not always the DEL key some BIOS's use F2 or F10 or anothother key combination, check your motherboard manual.

Understanding Your Computer's BIOS

Understanding Your Computer's BIOS

This report is to help you understand how your computer's BIOS works, what it does and understand the importance it plays in the use of your computer.

Definition: Basic Input/Output System (BIOS)
The BIOS chip uses EEPROM (Electrically Erasable Programmable Read-Only Memory) to be able so store the information contained in the BIOS software. This type of memory permits us to be able to later upgrade our BIOS to a newer version. The BIOS works in conjunction with the CMOS chip where the information from the BIOS settings is saved.
How it works:
When you turn the power ON on the computer, before your CPU can start loading your operating system, it needs to know what peripherals are available and what options your computer has. To be able to obtain all this information, the BIOS need to take over and begin it's tasks. Once all the BIOS's tasks are completed without any errors, the computer then goes on to boot up the operating system to be able to run normally. This is when you here the notorious beep, meaning your computer is working well according to your BIOS.
BIOS tasks:
Check the CMOS Setup for custom settings: The CMOS (Complementary Metal Oxide Semiconductor) is the chip where all the BIOS settings are stored. The CMOS chip can hold between 64 bytes to 256bytes of data. They need to be loaded up into the BIOS so it may begin to perform it's tasks, according to the way you have configured it.
Load the interrupt handlers and device drivers
The interrupt handlers are pieces of software that translate the actions of the hardware to make them understandable for the operating system. The device drivers are software that identify the type of hardware in question. The BIOS gets its name from this section, were it perform the basic input/output transactions between the hardware and the operating system. All the information that the BIOS gets is stored in a library of interrupt handlers. While your computer is running, whenever for example you press a key, the CPU must break to lookup that key in the library to know more about it.

Initialize registers and power management
After the information in the CMOS is loaded, and the video card is found, the BIOS sends a signal to start the BIOS located on the graphics card. When the graphics card's BIOS begins loading, the memory and graphics processor are initialized. Once the graphics have been taken care of, the BIOS checks to see if the computer underwent a cold boot or a reboot. The BIOS determines the type of boot by looking at the value at memory address 0000:0472. If the value is 1234h, then the computer was rebooted. Any other value corresponds to a cold boot.

Perform the power-on self-test (POST)
POST (Power On Self Test) is used to test all the hardware peripherals that are attached to your computer to see if they are working properly. It perform's a read/write test to all addresses in the memory, it look's for a mouse and keyboard on either the PS/2 or USB ports. It then proceeds to look trough, if available, all the PCI port to determined what is connected to the motherboard. This testing is skipped if the computer was rebooted
, determined in the previous step.
Display system settings
When you turn on your computer and screen, the first thing that you see it information display by your BIOS about your computer. You can normally see the amount of memory that is available, the different CD-ROM and hard drives available on your system, BIOS revision, date and more depending on your BIOS make. During the first few seconds that your computer is turned on, there is a very large amount of work being done to get your system ready to use. However, if your video card does not work, your BIOS will send a certain beeping command to either your internal speaker or you external speakers to notify you of this problem.

Determine which devices are bootable
Once the floppy, CD-ROM and hard drives are located, the BIOS checks to see which of these drives are bootable. It also refers to the CMOS setting to see the order of booting devices.

Initiate the bootstrap sequence
If there hasen't been any problems so far, the BIOS will attempt to load up the operating system. To be able to do so, it will go through in order the items listed from the CMOS and try to load the boot sector from each device, proceeding to the next if there is a failure in loading.

Configuring the BIOS:
Refer to you motherboard's manual to configure your BIOS settings! The different options vary from one BIOS maker to the other and therefore cannot be described here in depth.
To be able to configure your BIOS, you must first enter its setup window. To do so you must press a specific key, usually displayed at the bottom of your screen. If you don't know what key to press, refer to your motherboard's manual on configuring the BIOS. Once you have entered the BIOS configuration window, you we see the different sections listed at the top of the screen. So of the options that appear in all BIOS configuration windows are the following items.
System Time/Date - Set the time and date of the system
Boot Sequence - The order that BIOS search for a boot sector (operating system) on each device
Plug and Play - Used to auto-detect connected devices. It should be set to "Yes" if your operating system and you computer support it
Mouse/Keyboard - Enable Num Lock on startup, enable the keyboard, auto-detect mouse, require mouse/keyboard on startup, ...
Drive Configuration - Configure hard drives, CD-ROM and floppy drives
Memory - Direct the BIOS to shadow or copy itself to a specific memory address (increases the speed)
Security - Ability to set a password at the boot screen before accessing the computer
Exit - Save your changes, discard changes or restore default settings
Any changes made to any setting is saved in the CMOS memory chip to be used for future boot ups. The information in the CMOS is save even when the computer is turned off or even unplugged. There is a small 3 volt battery that maintains the information stored in the chip.
Many more option are included in the BIOS configuration window, but they all depend on the BIOS manufacturer. Usually there is a explanation on the right and side of the screen when you have the indicator over a item. For more information, refer to your motherboard manual.
BIOS Update:
Use extreme caution when updating the BIOS, an error could result in your computer no longer booting!
The BIOS may need to be updated to be able to support the newer technologies. This is especially true for older BIOS. These older ones do not always support the newer larger hard drives, new graphic cards, newer and faster memory, ... In order to make your computer support these newer technologies, you need to update your BIOS to a newer version, able to support these technologies. There are three ways to upgrade your BIOS to a newer version. The first way is called "Flashing the BIOS" which included overwriting the information in the EEPROM. Do can do this by accessing the flash window in your BIOS options. You normally need to press either the "Delete" key or the "F2" key. The second way is to use a "Flash BIOS Update" package that is usually distributed by the motherboard company. Follow the manufacturers instruction to make sure that the flashing goes properly and prevent serious damage to your computer. The third way is to change your BIOS chip. This is the hard and probably the most expensive way to upgrade it. I would only suggest using this as a last result, and have it done by a computer technician. You may need to consider this option for older computers, where the BIOS is unable to be flashed due to the type of memory it uses.

Useful tools:
Guide to understand BIOS beep codes for multiple BIOS manufacturers:
These beep codes have been made available trough the work of multiple people for TechRepublic. You can check here to see if a newer version is available

How can I reset CMOS or BIOS settings?

How can I reset CMOS or BIOS settings?

by :mayur khokhar

Question

How can I reset CMOS or BIOS settings?

Answer

If your computer is having issues booting, has errors during boot, after adding hardware is running into issues, or you're having other abnormal system behaviors that cannot be resolved though any other method it may be necessary to reset the CMOS settings or load the default or fail-safe defaults as explained below.
Load or Reset defaults
  1. CMOS restore defaultsEnter CMOS setup.
  2. In CMOS setup look for an option to reset the CMOS values to the default setting or an option to load the fail-safe defaults. With many CMOS setup screens there will be a function key to do this; for example, the F5, F6, F9, F11, or F12 key like shown in the picture to the right. Other setups may actually list an option that you can arrow over to using the arrow keys and press Enter.
  3. When found and selected you'll likely be asked if you're sure you wish to load the defaults press Y for yes or arrow to the yes option.
  4. Once the default values have been set make sure to Save and Exit and not just exit.
Reset Configuration Data
In addition to restoring the system defaults if you've recently added new hardware or resetting the default values did not help resolve your boot issues you may also want to reset the configuration data. Note: Not all CMOS setup screens will have this feature.
Under advanced
If you're working on a computer with a Phoenix BIOS that has Main - Advanced - Security - .... across the top of the screen you can get to this setting by using the right arrow to move over to Advanced and under Advanced arrow down to Reset Configuration Data and changing the value from Disabled or No to Enabled or Yes.
Once the above has been done press the F10 key and save and exit CMOS setup.
In PnP/PCI Configurations
If you're working with a Phoenix BIOS that has several different options and one of them is PnP/PCI Configuration move the cursor down to this option and press Enter. Within the PnP/PCI Configurations change the Reset Configuration Data from Disabled to Enabled.
Once the above has been done press the F10 key and save and exit CMOS setup.
Hard reset the CMOS
Caution: When inside your computer make sure you're aware of ESD and all it's potential dangers.
CMOS batteryIf the above steps do not reset the CMOS settings we suggest removing the CMOS battery for 5 minutes causing the computer to forget all settings. Removing the CMOS battery like the one shown in the picture to the right will cause the system to lose all CMOS settings including the password. To do this locate and remove the CMOS battery on the motherboard for at least five-minutes. After this has been done put the battery back into the computer and turn it back on.
If your computer does not have a CMOS battery or you're unable to find it you'll need to do a hard reset on the CMOS using a jumper or dip switch on the motherboard. Information on finding these can be found through your computer or motherboard documentation.

Additional information

  • See the BIOS and CMOS definitions for further information and related links.